Why should I use the Shower and Bath Kit?
We want you to use the best waterproofing products available on the market. However, it all depends on how much peace of mind you want with your new bathroom installation and the trade-off this has with the additional costs. A good estimate is that 90% of water leaks happen at the ledge between the shower tray or bath and the wall. So, using Classi Seal or Classi Plus has you well covered for the majority of water leaks. The Classi Kit for Shower Trays and Baths offers 100% waterproofing for the entire showering enclosure, not just the ledge between the shower tray or bath and walls.
For added peace of mind use the Classi Kit for Shower Trays and Baths.
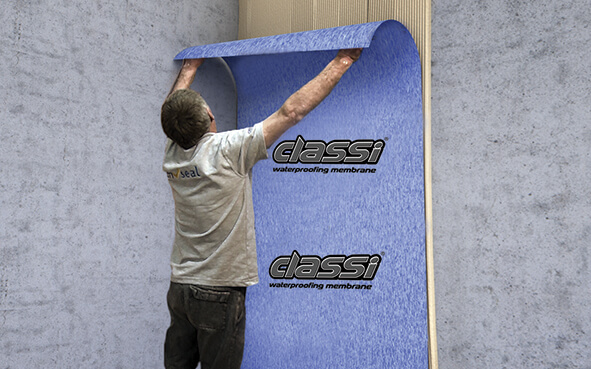
Step 1
After fitting Classi Plus apply tile adhesive over upstand and wall. Apply membrane print side out starting at the bottom ensuring a minimum of 75mm overlap and gap of approx 20mm from the corner. Press on firmly with the back of the trowel ensuring there are no air pockets.
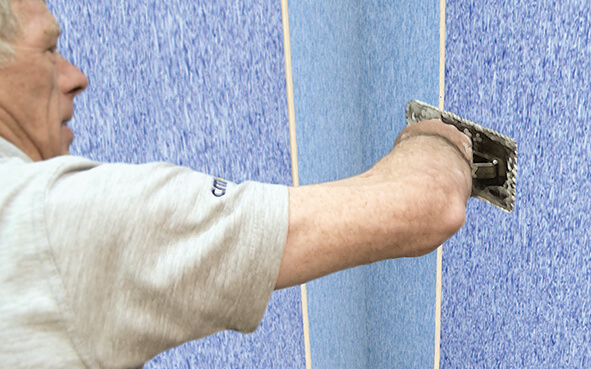
Step 2
Apply Classi corner and joint tape to the corners ensuring at least 75mm overlap on membrane and upstand.
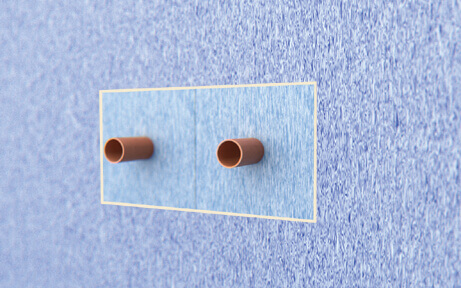
Step 3
For extruding pipes push over Classi Pipe collars, bonding to the wall with the tile adhesive and removing excess air.
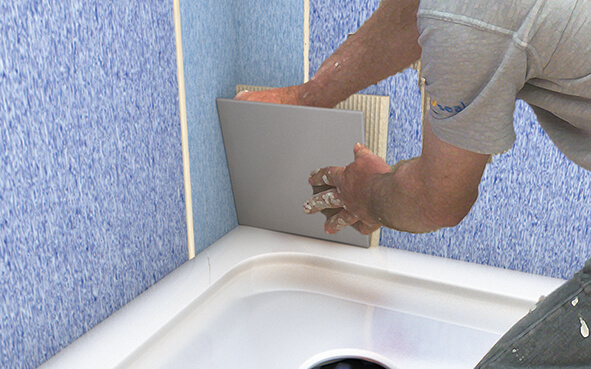
Step 4
As soon as the Classi membrane is applied to the wall you are ready to tile immediately, no waiting time.
Following tiling or wall panelling, finish with a Neutral Cure Sanitary Grade 100% Silicone.
Not sure what size of kit you need? Click here to see our size guide.