The wrong silicone has been used: How Do I rectify the problem?
If the silicone between the bath/shower tray and the bottom of the tiles is leaking a black fluid, the wrong type of silicone has been used during installation.
Step 1: Use a silicone removal tool or work knife to remove all the silicone.
Step 2: Using nail varnish remover (or a similar solvent), wipe the area clean, trying to remove any discolouring left.
Step 3: Wait for the area to dry and check to see if the leaching continues. If it does, keep repeating steps 2 & 3 until the leaching stops.
Step 4: Apply Classi Neutral Cure 100% Silicone to reseal the area.
Note: When using nail varnish or any other chemical cleaners it’s important to read the health and safety information and follow all guidance and instructions.
What Size Of Shower And Bath Kit Do I Need?
We have three sizes of kits, determined by the length of the wall touching sides, outlined in the table below.
Kit Size Needed
Two wall touching sides up to 2.0m
4.6m²
Two wall touching sides up to 3.2m
6.5m²
Three wall touching sides up to 4.0m
8.2m²
Shower Tray and Bath Kit Contents
Kit Size
4.6m²
6.5m²
8.2m²
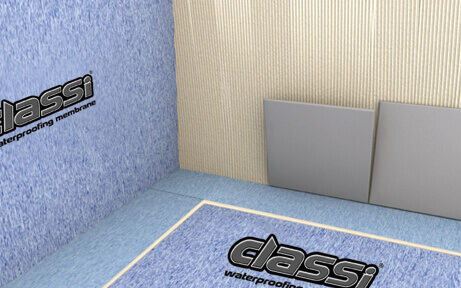
Classi Waterproofing Membrane*
4.6m²
6.5m²
8.2m²
Classi Plus
2.0m
3.2m
4.0m
Classi Corner and Joint Tape
2.5m
2.5m
5m
Classi Pipe Collars
2
2
2
Classi Neutral Cure (310ml) WHITE
1
1
1
* Each membrane is 1m in width
What Size Of Wetroom Kit Do I Need?
We have three sizes of kits, determined by the area of walls and floors that you want to waterproof.
Wetroom Kit Contents
Kit Size
6.5m²
8.2m²
11.1m²
Classi Waterproofing Membrane*
6.5m²
8.2m²
11.1m²
Classi Corner and Joint Tape
7.5m
7.5m
7.5m
Classi Internal Corner*
2
2
2
Classi External Corner*
1
1
1
Classi Pipe Collars
2
2
2
Classi Neutral Cure (310ml) WHITE
1
1
1
* Each membrane is 1m in width
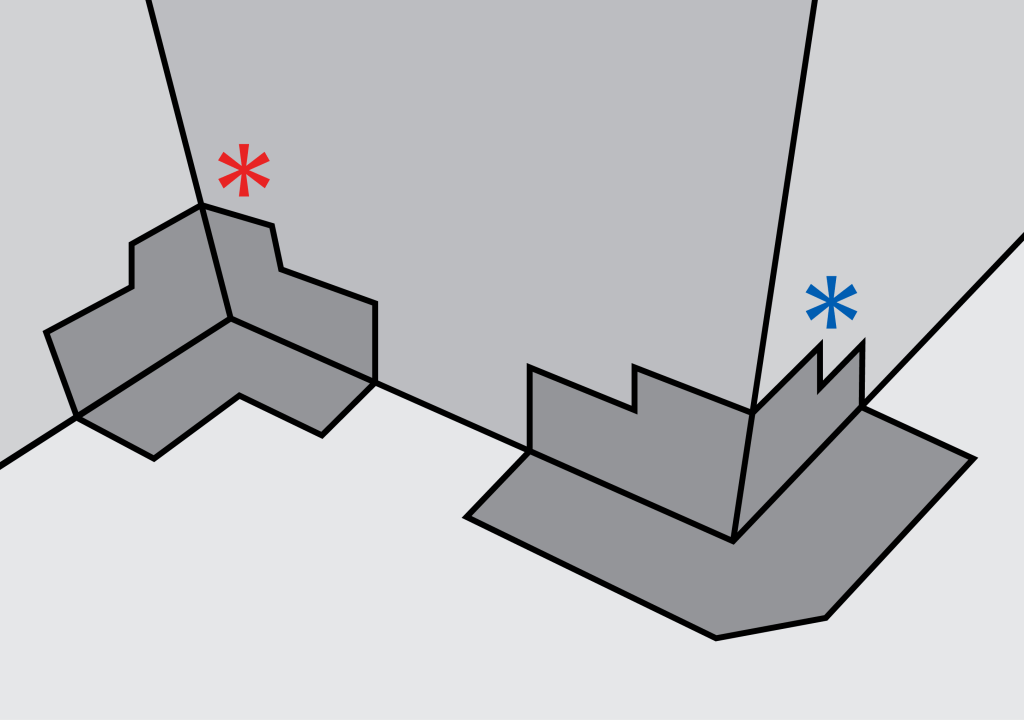
Classi Internal Corner Classi External Corner
What Size Of Classi Seal Or Classi Plus Do I Need?
For Classi Seal and Classi Plus it is relatively easy to work out the size of roll that you need. We have several roll sizes to avoid unnecessary waste. The length of roll corresponds to the wall touching sides of the shower tray or bath, so for a 1000mmx1000mm shower tray with two side installation you will need 2m of Classi Seal or Classi Plus.
How do I install a Classi Shower Tray and Bath Kit?
Why should I use the Shower and Bath Kit?
We want you to use the best waterproofing products available on the market. However, it all depends on how much peace of mind you want with your new bathroom installation and the trade-off this has with the additional costs. A good estimate is that 90% of water leaks happen at the ledge between the shower tray or bath and the wall. So, using Classi Seal or Classi Plus has you well covered for the majority of water leaks. The Classi Kit for Shower Trays and Baths offers 100% waterproofing for the entire showering enclosure, not just the ledge between the shower tray or bath and walls.
For added peace of mind use the Classi Kit for Shower Trays and Baths.
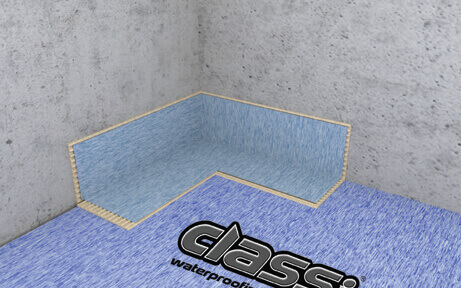
Step 1
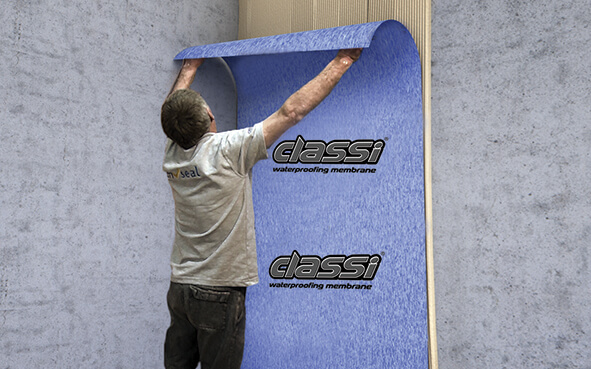
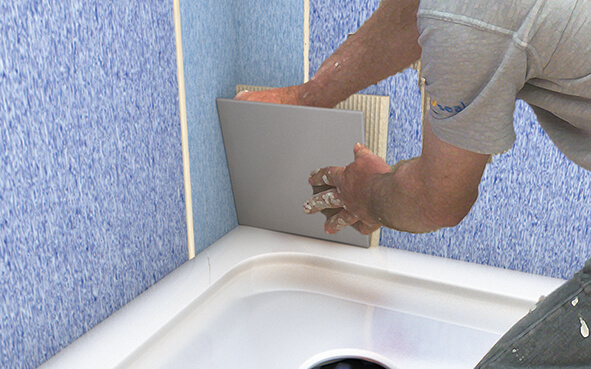
After fitting Classi Plus apply tile adhesive over upstand and wall. Apply membrane print side out starting at the bottom ensuring a minimum of 75mm overlap and gap of approx 20mm from the corner. Press on firmly with the back of the trowel ensuring there are no air pockets.
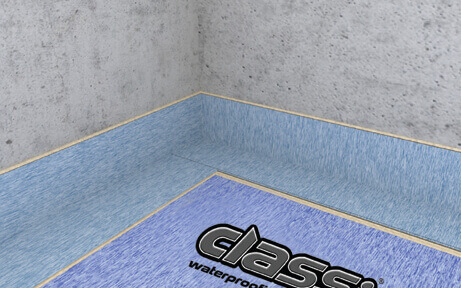
Step 2
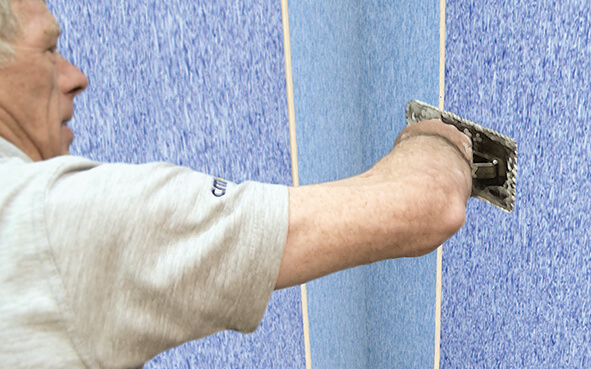
Apply Classi corner and joint tape to the corners ensuring at least 75mm overlap on membrane and upstand.
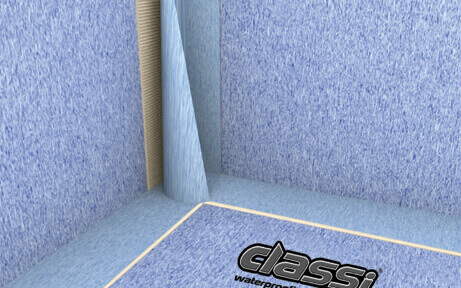
Step 3
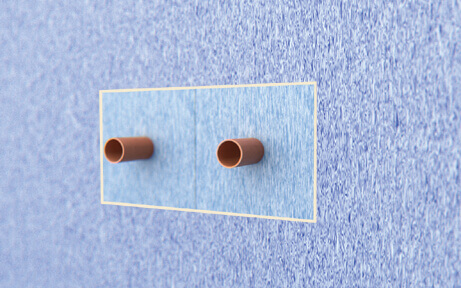
For extruding pipes push over Classi Pipe collars, bonding to the wall with the tile adhesive and removing excess air.
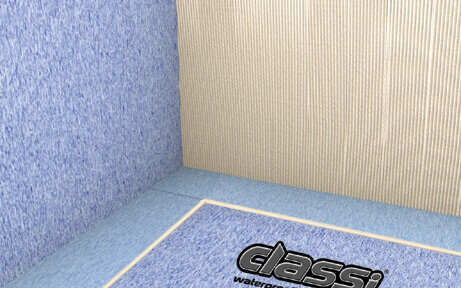
Step 4
As soon as the Classi membrane is applied to the wall you are ready to tile immediately, no waiting time.
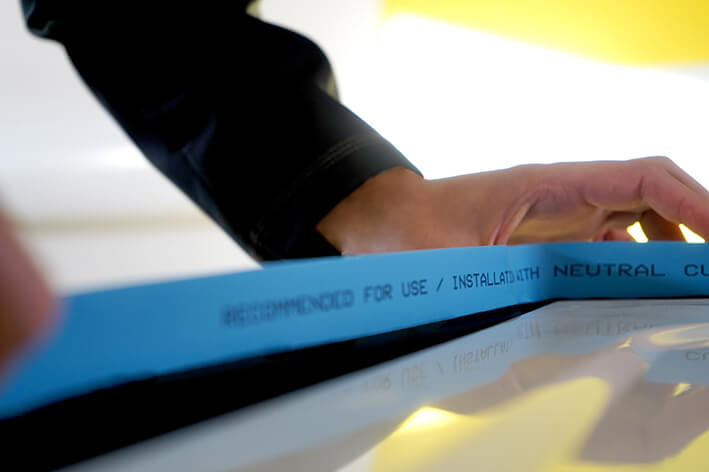
Following tiling or wall panelling, finish with a Neutral Cure Sanitary Grade 100% Silicone.
Not sure what size of kit you need? Click here to see our size guide.
How do I install a Classi Wetroom Kit?
Why Should I use a Wetroom Kit?
Unlike some waterproofing projects which are done for peace of mind, a wetroom must be fully waterproofed in order to stop water damage to the other parts of the house. You want to have complete freedom to use your wetroom space how you would like to. That only comes from 100% waterproof coverage. A Classi Wetroom kit comes with everything you need in one box, each product designed to work with each other to create the ultimate wetroom space.
Step 1
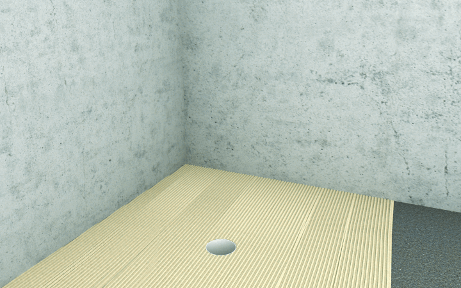
Apply tile adhesive to the floor area.
Step 2
Apply Classi waterproofing membrane and carefully cut the hole for the waste. Take care to leave enough membrane to overlap within the waste fitting.
Step 3
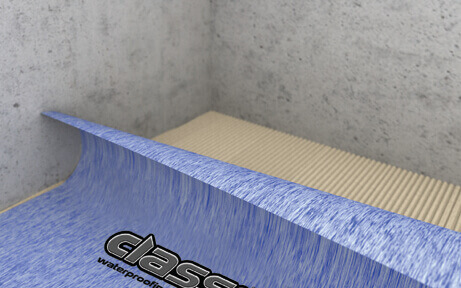
In the corner apply adhesive and corner piece.
Step 4
Apply adhesive and Classi corner and joint tape between the floor and walls.
Step 5
Apply tile adhesive and membranes to the wall, overlapping the Classi Corner and Joint Tape by at least 75mm. Do not apply wall membrane around the corner – leave a gap of approx 20mm between the Classi membrane and the corner.
Step 6
Apply adhesive and Classi corner and joint tape to the corners.
Step 7
For extruding pipes push over Classi Pipe collars, bonding to the wall with tile adhesive and removing excess air.
Step 8
Waterproofing completed. Ready to tile immediately, no waiting time.
Following tiling or wall panelling, finish with a Neutral Cure Sanitary Grade 100% Silicone.
Not sure what size of kit you need? Click here to see our size guide.
What is Neutral Cure Silicone?
Types of Silicone
Not all silicones are the same! You can spend several thousand pounds on a bathroom refurbishment and the cost of the silicone sealant can be as low as £2. But what is in that tube?
Silicones can be generally classed as either Acetoxy or Neutral Cure.
Acetoxy cure silicone gives off an acetic acid when curing, resulting in a pungent vinegar like smell.
Neutral Cure Silicones are relatively odourless, releasing an alcohol during the curing process.
Manufacturers like ourselves only recommend the use of Neutral Cure Silicones, as many of the Acetoxy Silicones have too many limitations. Acetoxy Silicones are often branded as general purpose, with different brands having varying degrees of added solvent – some Acetoxy Silicones can cause reactions with some rubbers and plastics.
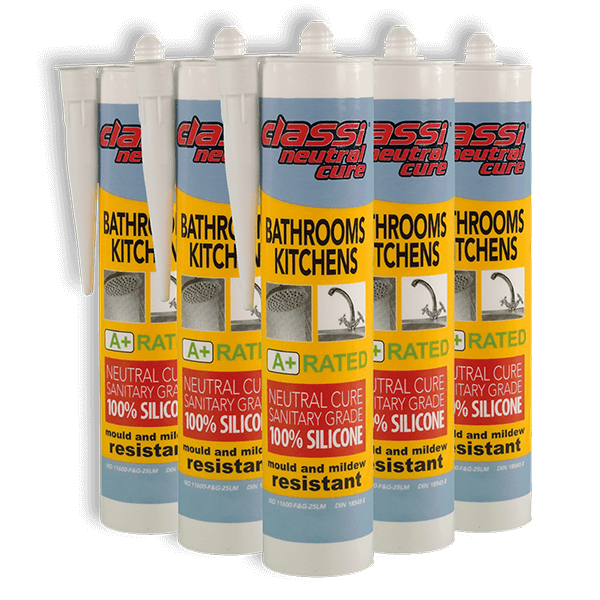
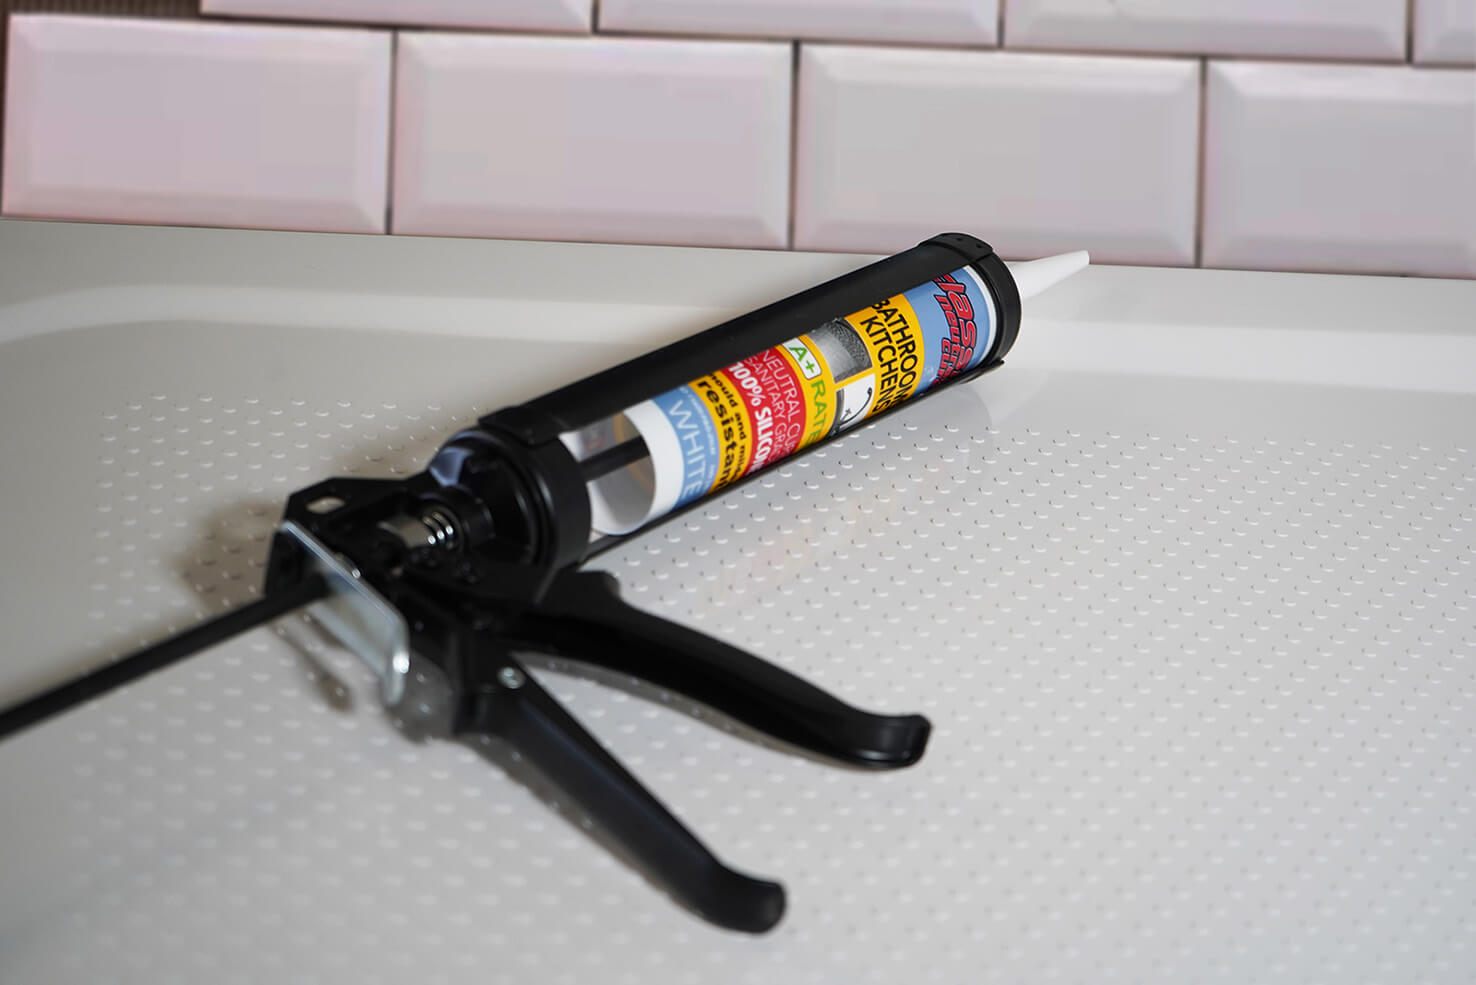
Classi Neutral Cure 100% Silicone
For the perfect finish, Classi has its own range of Neutral Cure, Sanitary Grade 100% Silicone.
Classi Neutral Cure 100% Silicone is designed to work perfectly with our Classi Waterproofing solutions. It is a premium low modulus silicone which has been specifically designed to have excellent adhesion and elastomeric properties for sealing joints in the bathroom and kitchen where movement can be expected.
This easy-to-use silicone is practically odourless when curing, is mould and mildew resistant and conforms to ISO11600-F&G-25LM. Classi Neutral Cure 100% Silicone comes in White and Clear.
We recommend the use of a Neutral Cure Sanitary Grade 100% silicone with our Classi products.
What is C2 Tile Adhesive?
What is C2 Tile Adhesive?
C2 is a classification of tile adhesive.
C for Cementitious
This means it comes in powder form to which you add water. Powder based tile adhesive does not need air to cure so is perfect to bond our membranes to the wall, as the membranes act as both a water and vapour barrier.
Bucket ready tile adhesive needs air to cure and should not be used to bond the membranes to the wall.
2 for Adhesive Level
The 2 in C2 means improved adhesive when compared to C1 which is normal adhesive. The adhesion test (C) is the most difficult to pass because the adhesive is put through a series of tests, freeze/thaw cycles, water immersion etc and then the bond strengths are measured after 28 days. C1 is greater than 0.5 N/mm2 after all the different cycles and C2 is greater than 1 N/mm2.
How much C2 tile adhesive will you need?
You’ll need approximately 3kg per m2 of Classi Waterproofing Membrane.
Do I need to Waterproof a Bath?
A bath on its own – used only as a bath does not need to be waterproofed. However, if you are planning on having an overhead shower above the bath then we would recommend that you consider how best to waterproof the installation.
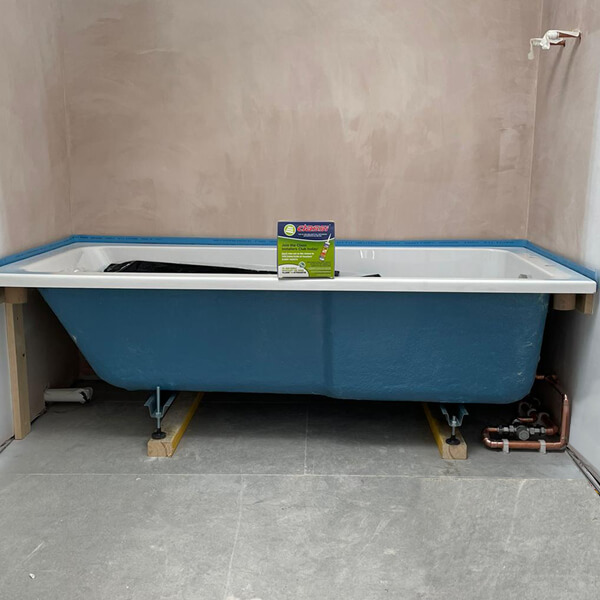
Classi Seal is our original product, favoured by installers since 2006 for waterproofing the ledge between the bath and the wall. It’s a reliable choice to ensure the critical junction between the wall surface and the bath is watertight.
Classi Plus should be used when you are fitting smaller format tiles like mosaic or subway tiles, or if you plan to use a liquid membrane in conjunction with your Classi Plus. Classi Plus also features a taller upstand which could be useful in some installations. For those wanting to waterproof the entire wall for extra protection when using the overhead shower, a Classi Waterproofing Kit for Shower Trays and Baths contains all the necessary materials.
How do I install Classi Seal?
Step 1
Thoroughly rough and clean the sides of the tray or bath that the Classi Seal is to be attached.
Step 2
Remove the backing paper 100mm at a time. Align the top of the adhesive strip with the top edge of the shower tray or bath and firmly press on by hand. The perfect fit will show just a bit of black above the shower tray or bath.
Step 3
Manipulate and widen the upstand at corners. Upstand is easy to manipulate by hand to fit into irregular internal corners which are not square, so as not to interfere with the tiling.
Step 4
Tiling can begin immediately. Classi Seal prevents leakage from around shower trays and baths caused by the inevitable shrinkage and movement within buildings.
Following tiling or wall panelling, finish with a Neutral Cure Sanitary Grade 100% Silicone.
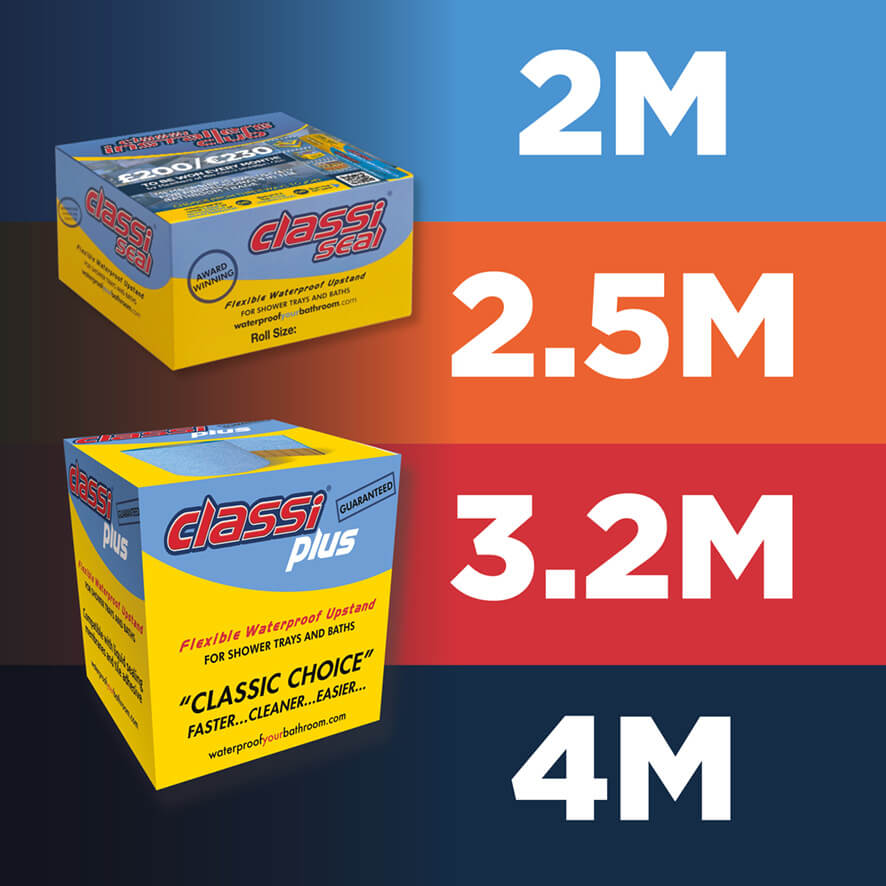
Classi Seal is available in 2m, 2.5m, 3.2m, 4m to be used in an unbroken, continuous run.