How To Install a Wetroom Kit
A wetroom kit contains multiple products all designed to work together to keep your space watertight but only when installed correctly.
Find Out More.What size Wetroom Kit do I need?
Our Wetroom kits are based on the square footage of floor and wall space you want to waterproof.
Find Out More.Why is using the right type of silicone important?
All Classi products are compatible with each other, if you're using other brands silicone there are a few things you need to know.
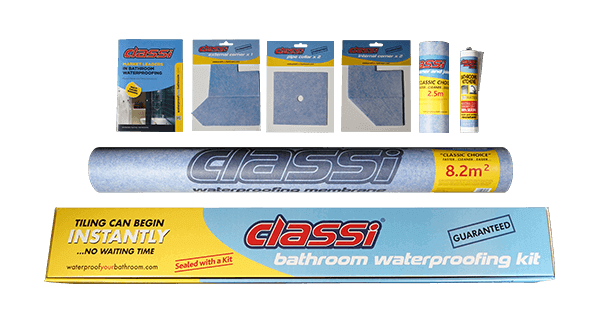
Find Out More.Classi Waterproofing Kit
For Wetrooms
6.5m2
8.2m2
11.1m2
Everything you need to waterproof the walls, floor, pipes and corners of a wetroom.
For too many people, the thought of putting in a wetroom showering area is dismissed because of the problems with waterproofing.
With our Classi Waterproofing Kit for Wetrooms you can have a wetroom in any room of your house. It is down to personal preference how the correct fall to the waste is achieved, either by using a wetroom former tray or having your installer screed the fall to the waste, generally on a wooden floor a former tray will be used.
Having created the fall to the waste, you apply C2 tile adhesive to the floor with a 4mm square notch trowel. Overlay the membrane and with the back of the trowel expel all air. Special wastes are available that clamp around the membrane, ensuring that any water leaks get diverted down the gulley. Next apply the corner pieces, again on top of tile adhesive and expelling air. Next we join the floor to the wall with the corner and joint tape, and when completed we apply the membranes to the wall. Pipe collars are also included in the kit. Tiling can begin immediately in the normal way.


See our other Classi products by clicking here.